
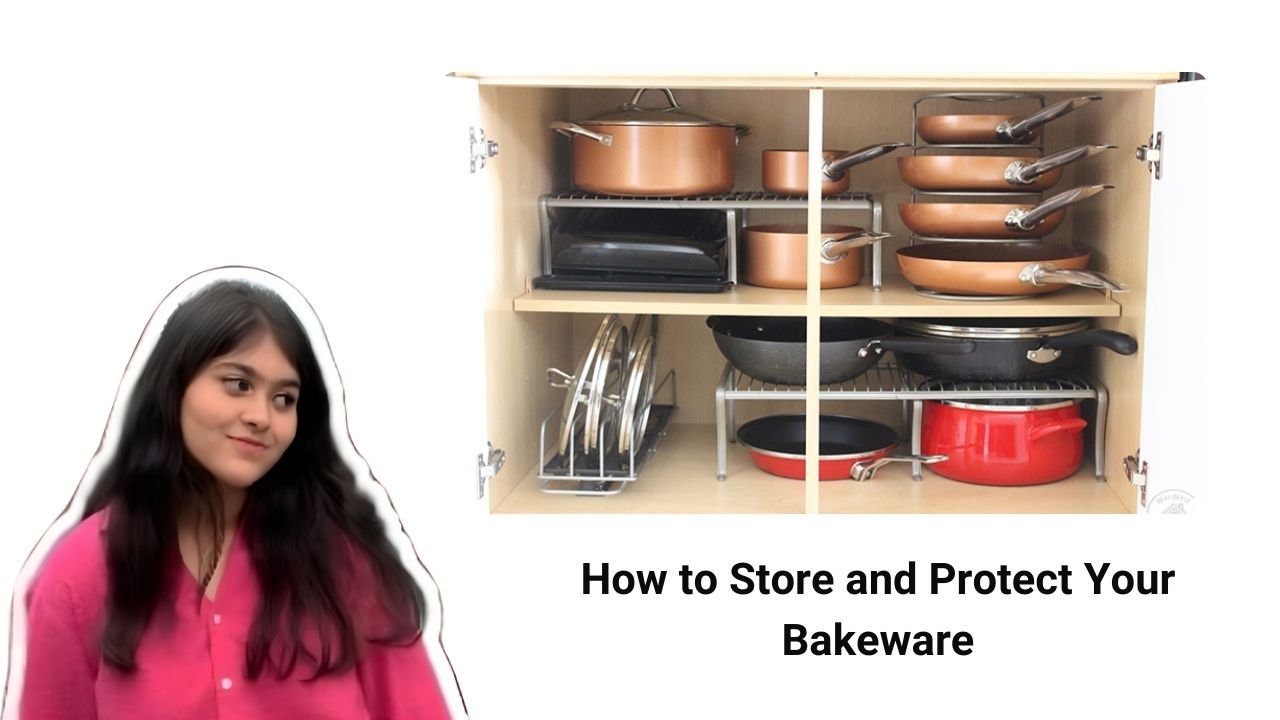
Smart Solutions for a Tidy Kitchen
Keeping your kitchen organized can feel like a never-ending game of Tetris—especially when it comes to bakeware. Whether you’re a weekend cookie baker or a sourdough fanatic, the way you store your baking pans, sheets, and dishes can make or break your kitchen routine. Ever opened a cabinet only to have your round cake pans come crashing down like a metal avalanche? Yeah, me too. That’s why learning how to store and protect your bakeware isn’t just about tidiness—it’s about peace of mind.
The truth is, bakeware isn’t cheap. And scratches, dents, or chips can ruin their performance. From glass baking dish organizers to vertical baking pan storage, there are clever ways to store every piece safely and efficiently. Think of it as giving your bakeware a cozy home—one where every piece has its place and doesn’t get scratched, shoved, or forgotten.
In this guide, I’ll walk you through simple, intuitive methods that will help you organize, protect, and maximize your kitchen space—no matter the size. We’ll cover smart hacks, storage tools, and even a few DIY baking pan storage tricks you can try this weekend. Ready? Let’s dig into the batter (and your cupboards).
Declutter First: Only Keep What You Love and Use
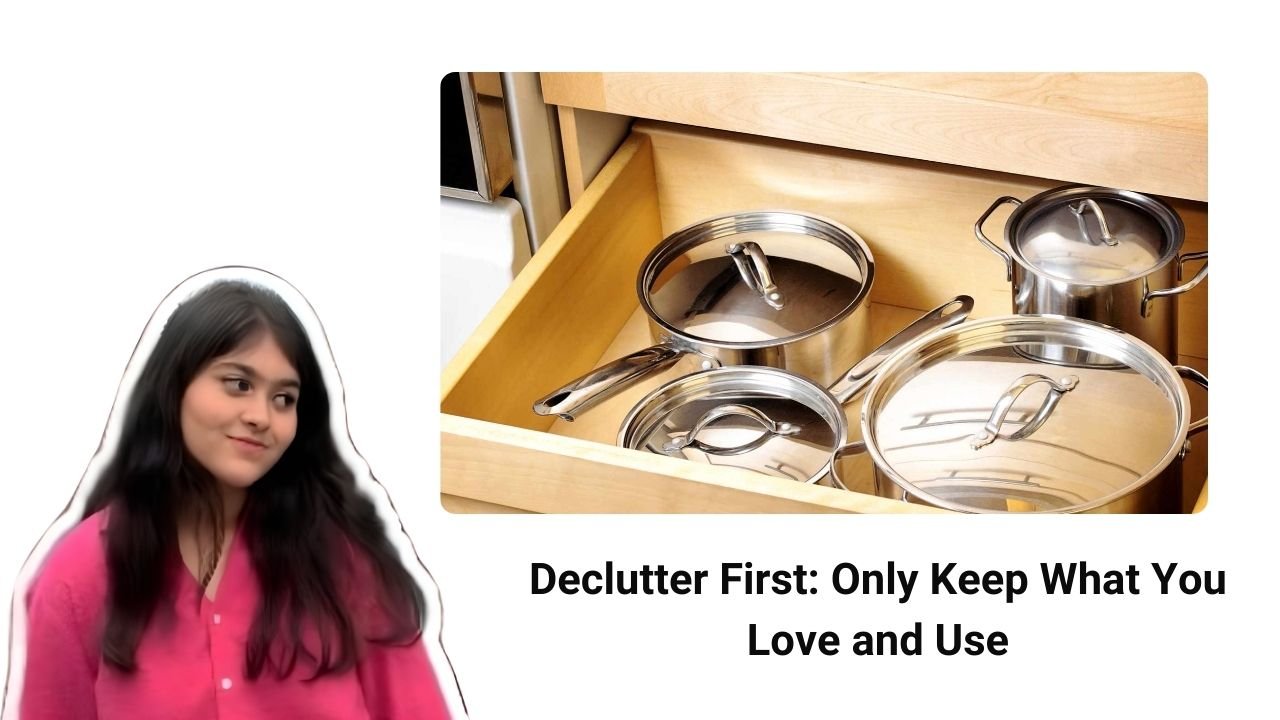
Let’s start with the hard truth: we all have that one bent baking tray or rusted muffin pan that should’ve been retired years ago. So before you start organizing, declutter. Ask yourself—when was the last time I used this? Do I really need five loaf pans? This is your moment to Marie Kondo your bakeware collection.
Start by spreading everything out on the counter. It might be overwhelming at first, but it’s the best way to get a full view of what you own. Group similar items together—cookie sheets, muffin tins, cake pans, glass baking dishes, etc. You’ll be surprised how many duplicates you have.
Here’s a quick way to decide what stays:
- Keep pieces you use at least once a month
- Toss or donate anything chipped, rusted, or warped
- If it only serves one purpose and you haven’t used it in over a year, it’s probably time to let it go
Once you’ve sorted everything, cleaning your cabinets and drawers comes next. Wipe them down with warm, soapy water and let them dry completely. A fresh, clean space makes organizing feel even more rewarding.
The beauty of decluttering is that it clears your mind and your space. And with fewer items to manage, finding the right piece becomes a breeze. That’s the first real step to mastering how to store and protect your bakeware.
Smart Storage Starts with Accessibility: Think Frequency First
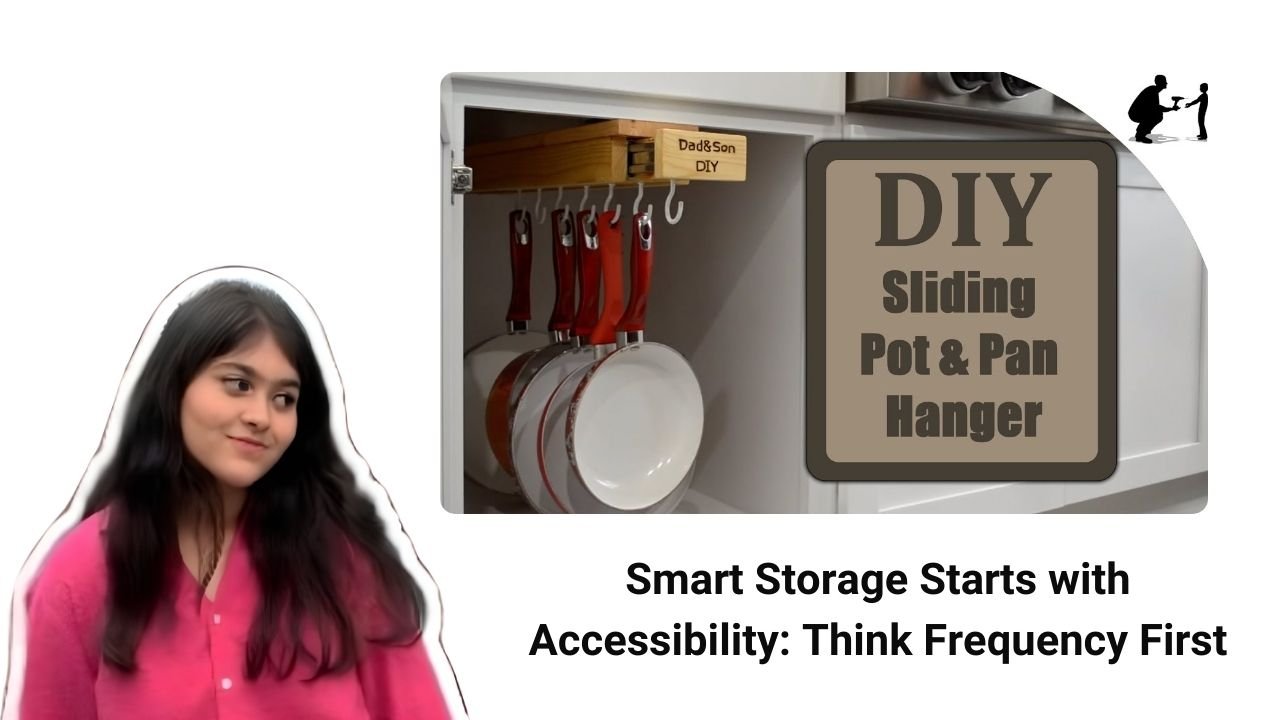
Now that you’ve narrowed down your collection, it’s time to put things back—but with intention. The golden rule? Store based on how often you use each item. Think of your kitchen like a zone system. Daily-use items like your go-to cookie sheet or glass baking dish should be front and center. Holiday pie plates? Tuck them away until November.
Here’s a great system I use:
- High-use bakeware: Store in a lower cabinet or drawer close to your oven
- Occasional-use bakeware: Keep in higher shelves or the back of deep cabinets
- Rarely used pans: Consider storing in a separate area, like a pantry or rolling cart
Using deep drawers can also be a game-changer. If you’re lucky enough to have one, dedicate it solely to bakeware. Place muffin tins, round cake pans, and other oddly shaped items inside with soft dividers to prevent scratching. It not only keeps them safe—it makes grabbing what you need a quick, one-handed move.
Think vertically, too. Just like books on a shelf, pans can stand up in baking tray storage racks. IKEA and other home brands sell brilliant bakeware storage rack options that fit inside cabinets and drawers. These keep your pans separated, stop them from shifting, and save tons of space.
Remember, organization isn’t about perfection. It’s about making your life easier. So if you find yourself always reaching for the same few pans, make sure they’re the easiest to grab. That’s what smart storage is all about.
Protecting Bakeware From Scratches and Damage
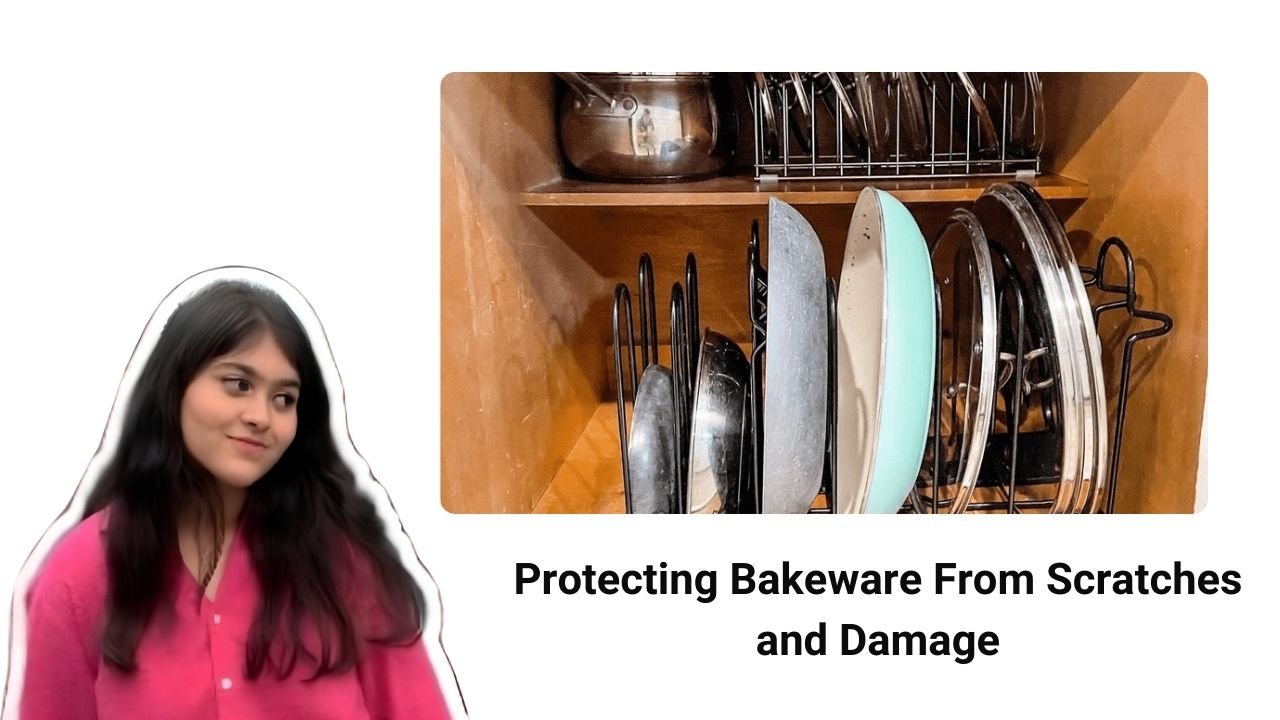
Storing is one thing. Protecting your bakeware? That’s where most people slip up. You wouldn’t throw your favorite sunglasses into a drawer without a case, right? So why let your nonstick pans or glass dishes get scratched or chipped?
The first rule here is simple: never let metal touch metal directly. Stack your pans if you must, but always separate them with soft layers in between. Paper towels, silicone mats, or even felt pan dividers work wonders. I sometimes use paper plates for a quick fix—it’s affordable and effective.
If you have to stack, stack smart:
- Group by size and shape to avoid wobbling
- Always place the heaviest pan at the bottom
- Use soft pads between layers to prevent scratching
And if space allows, skip stacking altogether. Go vertical using a DIY baking pan storage rack or a ready-made baking pan organizer. These tools not only reduce wear and tear but also make it way easier to grab what you need without lifting a whole stack.
For larger pieces like roasting pans or casserole dishes, consider a rolling cart. These are especially helpful in smaller kitchens where cabinets are precious real estate. Slide the cart into a corner or pantry, and boom—easy access with zero clutter.
Protecting your bakeware is an act of care. These are the tools that help you create memories, after all. Treat them kindly, and they’ll serve you well for years to come.
Creative Storage Hacks for Every Type of Bakeware
Not all bakeware is created equal. A cookie sheet and a bundt pan have very different needs. That’s why tailored storage is so helpful. Let’s break it down by type and look at some fun, clever ways to store each.
| Bakeware Type | Best Storage Solution |
| Baking Sheets | Vertical rack or toe-kick drawer |
| Round Cake Pans | Nest with soft liners or wall-mounted shelves |
| Muffin Tins | Deep drawers with dividers or cubbies |
| Glass Dishes | Cabinet with foam pads or shelf liner |
| Silicone Molds | Clip to a rod using binder clips or hang on pegboard |
| Lids | Separate basket or lid rack |
For flat bakeware like sheets and trays, baking tray storage – IKEA-style is perfect. Try using a pan organizer rack inside a cabinet to store them upright. Not only does it save space, but it also prevents warping and keeps them scratch-free.
Have unused space under your kitchen cabinets? Install a toe-kick drawer. These shallow drawers are ideal for stashing flat pans or cooling racks. It’s a brilliant way to reclaim what’s usually wasted space.
For your round cake pan storage, consider stacking them with foam liners in between or installing mini-shelves inside your cabinet. A lazy Susan can also work wonders if you have the right corner cabinet.
Got a stash of silicone molds? Use a shower curtain rod and binder clips to hang them from the side of a pantry shelf. They stay flat, out of the way, and easy to see. You can also use a pegboard wall with hooks for these light, flexible pieces.
Customize Your Cabinets: Tailored Storage for a Stress-Free Kitchen
If you’ve ever stared at your cluttered kitchen cabinet wondering where your favorite brownie pan disappeared to, you’re not alone. That’s where customizing your cabinet layout makes all the difference. You don’t need a full kitchen renovation—just a few smart tweaks to make your space work harder for you.
Start with adjustable shelves. Many standard cabinets allow you to move shelves up or down, which helps when storing taller pans or stacking items with dividers in between. Want to go a step further? Install narrow vertical partitions—these create vertical baking pan storage slots. Think of it like a mail sorter but for your pans.
Slide-out trays are another fantastic feature. These let you pull your pans out instead of reaching deep into the cabinet and shuffling through a mountain of metal. You can buy pre-made slide-out shelves or install DIY baking pan storage trays using basic hardware from the home store.
Another brilliant trick? A baking pan storage cabinet. These are purpose-built pieces—many inspired by baking tray storage – IKEA designs—that include thin slots, soft-close drawers, and adjustable racks. They’re ideal for serious bakers or anyone with a decent collection of specialty pans.
A customized cabinet isn’t just about aesthetics. It reduces frustration and prevents damage. When everything has its place, it’s easier to clean, easier to grab, and way more fun to use. A tailored setup turns your baking station into a stress-free zone, and honestly, that’s half the joy of baking.
Store Lids Separately: Avoid Scratches, Save Space
Let’s be honest—bakeware lids are like the socks of the kitchen. They vanish. They get scratched. They never seem to be where you need them. That’s why storing lids separately is a pro tip that’ll change your kitchen game completely.
First, figure out how many lids you actually have and what they belong to. Group them by size or by material (glass, metal, silicone). Then, find a small basket, bin, or even a file sorter to store them upright. Keeping them separate helps prevent chips or cracks, especially on glass baking dish lids, which are prone to damage if stacked with heavy pans.
If you’ve got a cabinet door to spare, consider a mounted lid rack. These make use of vertical space and allow you to easily see what you have. Another clever hack is to use tension rods inside a drawer to create custom sections just for lids.
This tiny change makes a big impact. You won’t be rummaging through a pile of pans anymore. Plus, keeping lids unstacked means your bakeware storage rack stays neater, and your baking dishes last longer. No more mystery lids. No more scratches. Just calm, clean organization.
Hanging and Creative Displays: Stylish & Space-Saving
Sometimes, the best way to store something is to put it on display. Hanging your bakeware isn’t just practical—it can also add a charming, rustic vibe to your kitchen. If you’ve got empty wall space, why not turn it into a baking command center?
Install a pegboard and use hooks to hang lightweight pans, molds, and tools. It’s affordable, adjustable, and surprisingly sturdy. Want a cleaner look? Opt for a wall-mounted bakeware organizer—many styles come in sleek metals or wood finishes to match your decor.
Even a simple shower curtain rod mounted under a shelf or across a pantry wall can work wonders. Use binder clips to hang silicone mats, flexible molds, or even cooling racks. It’s an unexpected solution that keeps soft, awkwardly shaped items flat and accessible.
Here are some more creative display ideas:
- Wire baskets on the wall for stacking muffin tins
- Magnetic strips for metal tools or small pans
- Decorative shelf brackets to hold cookie sheets like artwork
Don’t be afraid to think outside the cabinet. Hanging solutions add personality and function. They’re especially helpful in small kitchens where every inch of space counts. And let’s face it—when your tools are easy to see and reach, you’re more likely to use them. That’s the whole point of learning how to store and protect your bakeware in a way that suits you.
Clean and Care: The Foundation of Lasting Bakeware
Storing bakeware properly is key, but it won’t do much good if your pieces aren’t cleaned and cared for first. Think of it like tucking your bakeware into bed—it deserves a little love before it gets put away.
Before the first use—and after every baking session—wash your pans with warm, soapy water. Avoid abrasive sponges on non-stick surfaces. Let everything dry completely before storing it to avoid rust or mold, especially on metal bakeware and silicone molds. A clean, dry pan is less likely to stain, warp, or corrode.
For tougher messes, baking soda and vinegar work wonders without damaging surfaces. Avoid harsh chemicals—they can strip away protective coatings or even leave behind residues that affect food flavor.
Here’s a quick care checklist:
- Nonstick pans: Use only soft cloths and silicone utensils
- Glass baking dishes: Let cool before washing to prevent cracking
- Silicone molds: Rinse well to remove oily buildup
- Metal pans: Dry thoroughly and stack with pads to avoid rust
And don’t forget about routine checks. Every few months, inspect your pans for wear and tear. A scratched nonstick coating or a cracked glass lid isn’t just annoying—it can be unsafe. Replace what’s worn out and treat what’s left with care.
At the heart of it all, proper care and thoughtful storage go hand-in-hand. You’re not just organizing a kitchen. You’re preserving your baking joy, one pan at a time.
Final Thoughts: Bakeware That Lasts a Lifetime
Mastering how to store and protect your bakeware isn’t about achieving Pinterest perfection. It’s about creating a system that works for you. A system that lets you bake stress-free, find what you need instantly, and keep your beloved pans in top shape for years to come.
When everything has a home—from your round cake pans to your glass baking dish organizer—your kitchen becomes a place of ease, not chaos. You’ll stop wasting time rummaging through cluttered cabinets or dealing with scratched, ruined pans. Instead, you’ll have more time and energy for the things that matter—like making fresh banana bread on a lazy Sunday morning.
Here’s a quick recap of what we covered:
- Declutter first, keeping only what you love and use
- Store based on frequency of use for maximum efficiency
- Use vertical and customized solutions to save space and reduce damage
- Protect bakeware with liners and dividers to prevent scratches
- Clean and care for your bakeware regularly to extend its life
- Get creative with wall space, rods, carts, and pegboards
By integrating these simple habits and smart tools—from a baking pan storage cabinet to a bakeware storage rack—you’re not just organizing pans. You’re creating a happier, calmer, and more inspired kitchen. And let’s be honest, isn’t that what baking is all about?

Hey, I’m Nandoza Ahammad, passionate food enthusiast and creator of narzcookingcave.com, shares delicious recipes and cooking tips worldwide.